This is a fairly simple text effect that will give your text a chrome looking effect. Again all that is needed is Paint Shop Pro 5. No special filters are required.
Step #1
- Start at the Menu Bar or the Tool Bar and select a New Image.

- This will open the New Image Dialog Box, set the following:
- Width = 375
- Height = 75
- Resolution = 72
- Background = White
- Image Type = 16.7 Million Colors (24 Bit)

Step #2
- From the Paint Palette set the foreground color to White.

- Now with the Image Box open you are ready to insert some text.
- From the Tool Palette select the Text Tool

- Place the cursor in the middle of the Image Box and left click the mouse button. This will open the Add Text Dialog Box. Select a text of your choice, be sure that Antialias, Center and Floating are checked. Type in what ever you want and select OK.
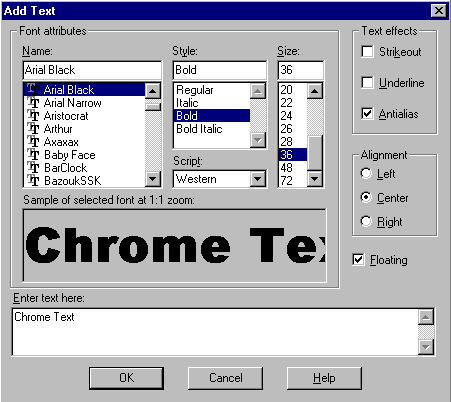
- You should now have something that appears like the image below. Do not deselect the text during this tutorial.

Step #3
- From the Menu Bar select Image, Other, Hot Wax.

- Now go back and apply this two (2) more times. Your Image should now look like the following.

Step #4
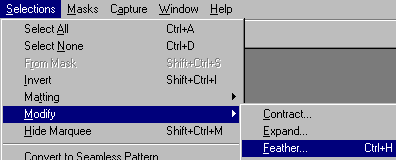
- Now we need to add a little more working room to the text. From the Menu Bar select Selection, Modify, Feather
- From the Feather Selection box set the Number of Pixels at four (4).

- You should now have the extra working room need for the next step.

Step #5
- Now go back to Step #3 where you applied the Hot Wax and repeat the step only this time apply it only twice.
- Again go back to the Menu Bar select Image, Sharpen, Sharpen More.

- Repeat this two (2) more times and you should now have a text that appears to have a Chrome Effect.

- You can now deselect the text and save it or go one more step and add a drop shadow.